


It’s said that Japanese chisels (nomi) were once forged by swordsmiths after the end of the Samurai period in the 19th Century. Their construction is regarded as an art form in Japan. Similar to their Western counterparts, but with a shorter blades, they take various forms for specific uses. A key difference is the quality of the steel and how they’re forged.
Harder steel, sharper edges
Unlike a Western single metal blade, the edge of a Japanese chisel is twin-layered with a hard, steel cutting layer supported by thicker, softer steel, which acts like a shock absorber. Consequently, the edge can be hardened to a higher degree than it’s Western counterparts and the shock absorption capacity means it can be struck harder without the fear of cracking. Regular sharpening is necessary to maintain it’s sharp edge compared with Western chisels.
Striking and push chisels
Generally, there are two styles of Japanese chisels, those you strike with a hammer and those you push with one or two hands.
TYPES
Oire
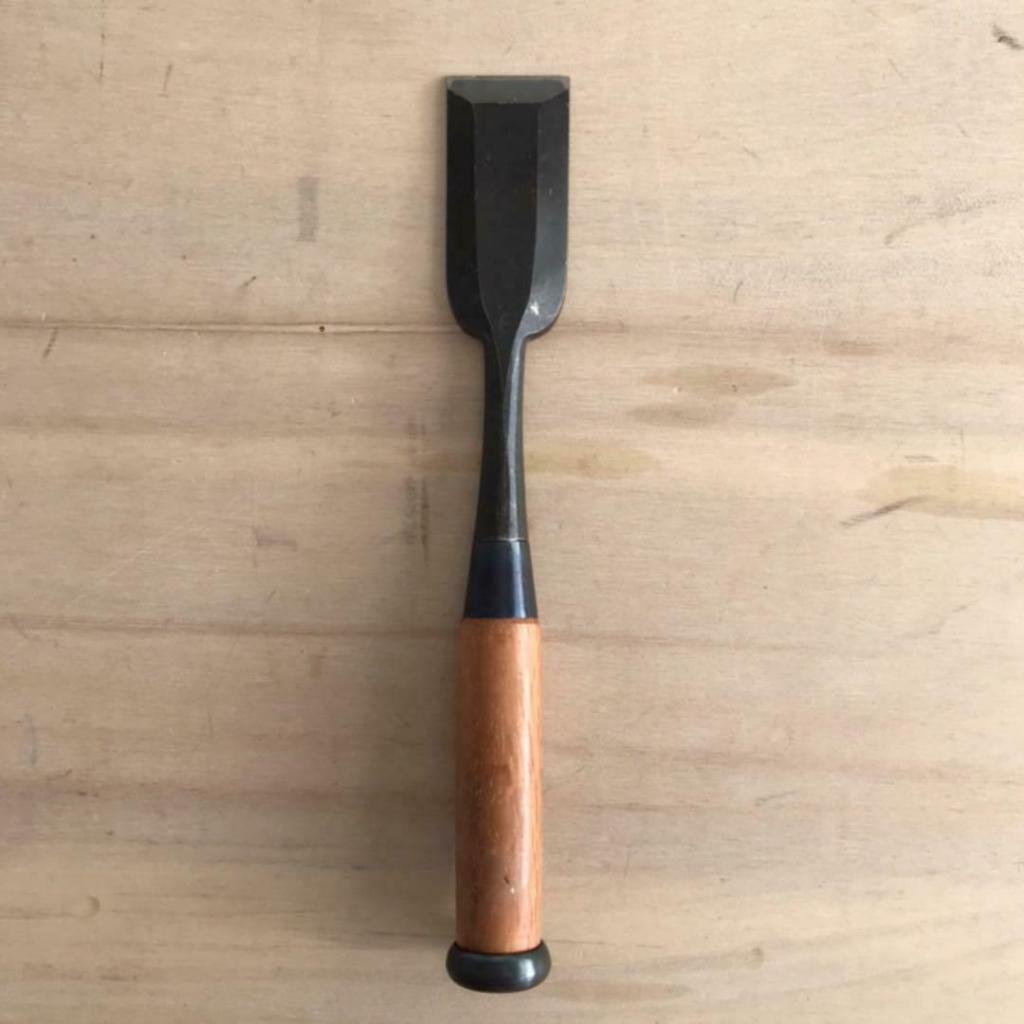
Summary: A short, multi-purpose chisel of choice for carpenters and woodworkers, the top face has wide chamfer on both sides reducing friction when mortising
Style: Striking
Ideal for: Scoring, making tenons, cleaning out mortices
Tips: Use a smaller size, with a narrower chamfer for greater strength
Blade width: Huge array, from 3-43mm
Atsu

Summary: Fundamentally a larger, wider oire nomi for bigger tasks
Style: Striking
Ideal for: Large joints, levering out wood from a mortise
Tips: Larger blades of 30 and 50mm are called ‘hiro nomi’
Blade width: mainly 4 sizes of 12, 15, 18, 24mm
Mukomachi
Summary: A mortise chisel with a narrow neck and blade which are the same thickness allowing for deep, narrow mortising
Style: Striking
Ideal for: making narrow grooves and mortices
Tips: The blade tapers gently towards the neck, preventing damage to the sides of the mortice
Blade width: 1-15mm
Sokozarai
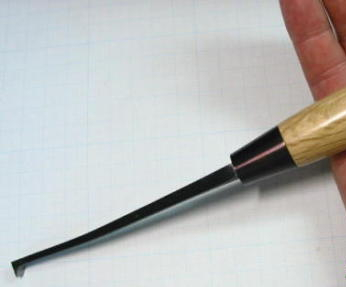
Summary: A thin, goose-necked tool with a spade like end, known as a ‘bottom-cleaning’ chisel
Style: Push
Ideal for: final part of morticing and clearing the base of the mortice
Tips: Never hit with a hammer, push with one or two hands
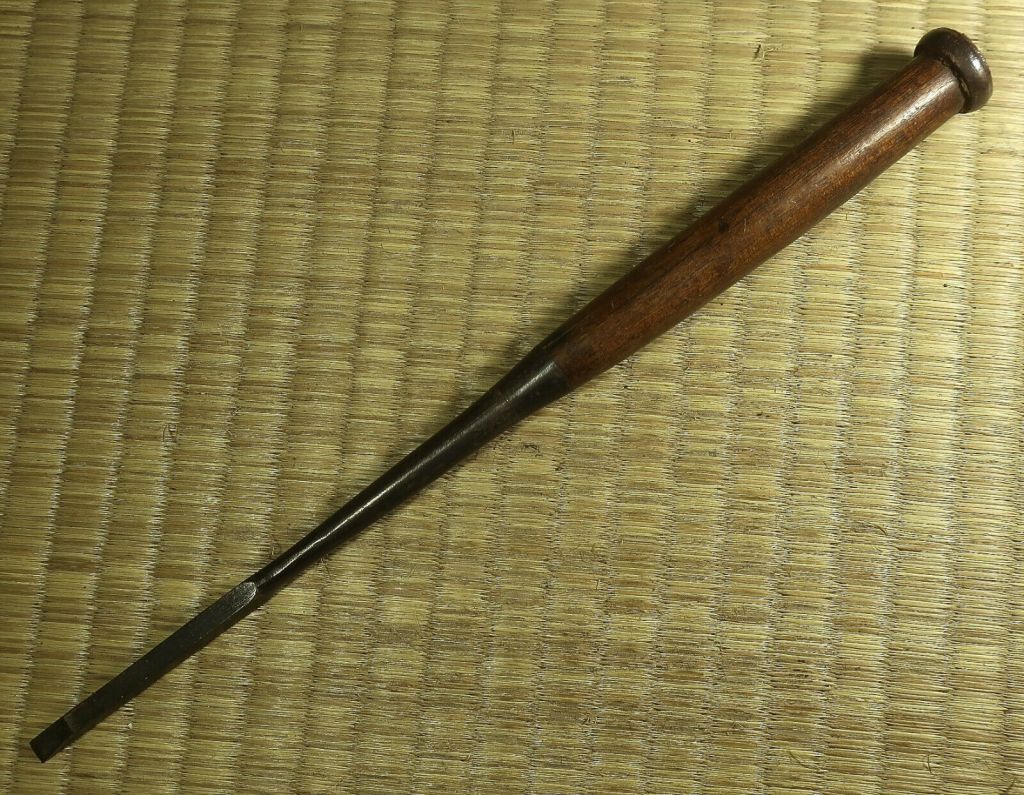
Usu

Summary: The catch all term for Japanese ‘paring’ chisels used for finishing work, they are light, long and thin
Style: Push
Ideal for: Paring and shaving off small amounts of material
Tips: Never use a hammer or mallet or leverage large chunks
Tsuki

Summary: A longer version of the ‘usu’ paring chisel for larger finishing work
Style: Push
Ideal for: cleaning up longer, deeper mortises or smoothing a large tenon
Tips: Use two hands for this larger chisel
Kote
Summary: Known as the ‘trowel’ chisel because of it’s cranked neck
Style: Push
Ideal for: cleaning up grooves in sliding dovetails
Tips: Using the cranked handle means you won’t hit your hand on the wood
Maru

Summary: A finishing chisel, with convex and concave versions
Style: Striking and push versions
Ideal for: deep long cuts and paring
Tips: There are carpenter and sculptor versions, the latter being lighter and pushed by hand
Kama
Do you have a picture of this? We’d love to use one, please contact us
Summary: A sickle-shaped, curved cutting edge, bevelled on both sides, known as the Japanese ‘sickle’ chisel
Style: Push
Ideal for: Cleaning up sharp interior corners of mortices and dovetails
Tips: Push by hand only
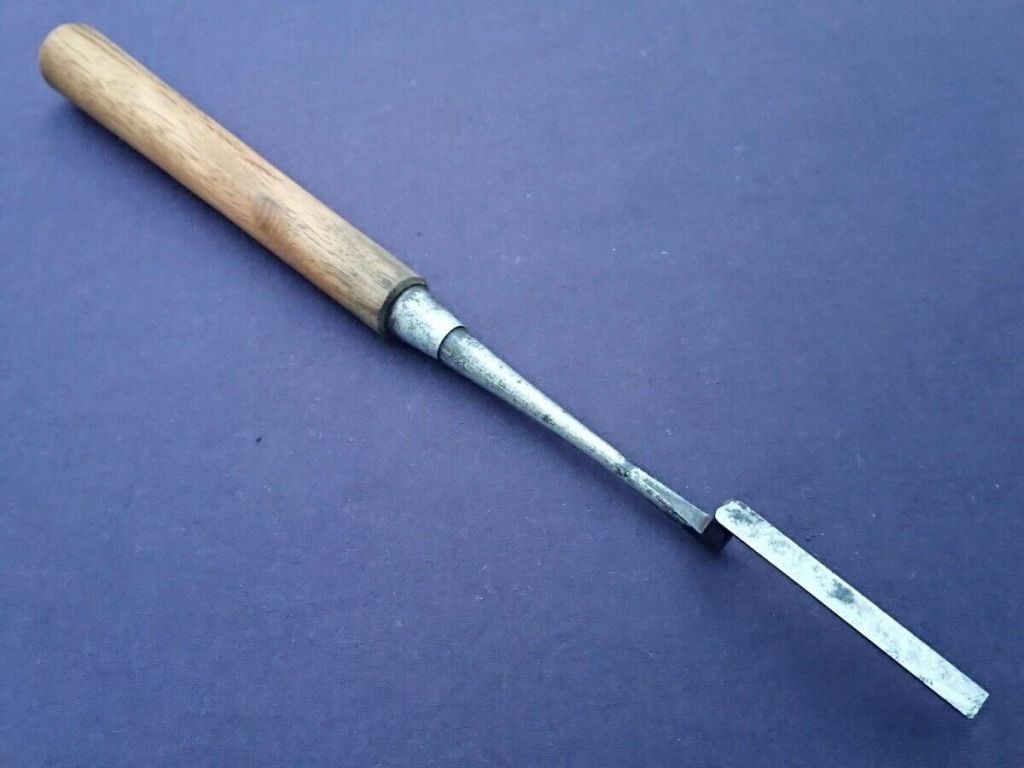
Mori
Do you have a picture of this? We’d love to use one, please contact us
Summary: Instead of levering out wood chips with a mortise chisel (Western style), the Japanese use this ‘harpoon’ chisel to hook out the chips instead
Style: Striking
Ideal for: clearing out mortices for sliding screens, doors and windows
Tips: Tap down and then quickly jerk the tool up to free out the chips from the mortice
